LiftMaster Keypad Instruction Manual: A Comprehensive Guide (Updated 04/07/2026)
This manual provides detailed instructions for programming and troubleshooting your LiftMaster keypad, ensuring secure and convenient garage access. It covers initial setup, PIN changes, and resets.
LiftMaster keypads offer a convenient and secure alternative to traditional garage door remotes, providing keyless entry to your home. These devices allow authorized users to operate the garage door using a personal identification number (PIN).
They enhance security by eliminating the risk of lost or copied remote controls. Modern LiftMaster keypads boast features like backlit displays for easy nighttime use and weather-resistant construction for durability.
Programming is straightforward, enabling homeowners to easily manage access and customize settings. This guide will walk you through every step of the process.
Benefits of Using a Keypad
Employing a LiftMaster keypad delivers numerous advantages, notably enhanced security and convenience. Keypads eliminate the need for physical keys or remotes, reducing the risk of lost or stolen access.
They’re ideal for families, allowing unique PINs for each member, or for granting temporary access to guests or service providers.
Keypads streamline daily routines, especially when hands are full, and offer peace of mind knowing your garage is securely controlled.
Furthermore, they provide a reliable backup access method if remotes are misplaced.
Keypad Models and Compatibility
LiftMaster offers a range of keypads, including standard and enhanced models, each with varying features and compatibility. Common models include the 877MAX, 878MAX, and older series.
Compatibility depends on your garage door opener’s receiver frequency and rolling code technology.
Most LiftMaster keypads are compatible with openers manufactured after 1993, utilizing rolling code technology for enhanced security.
However, older systems may require specific adapters or programming procedures. Always verify compatibility before purchasing a new keypad to ensure seamless integration.

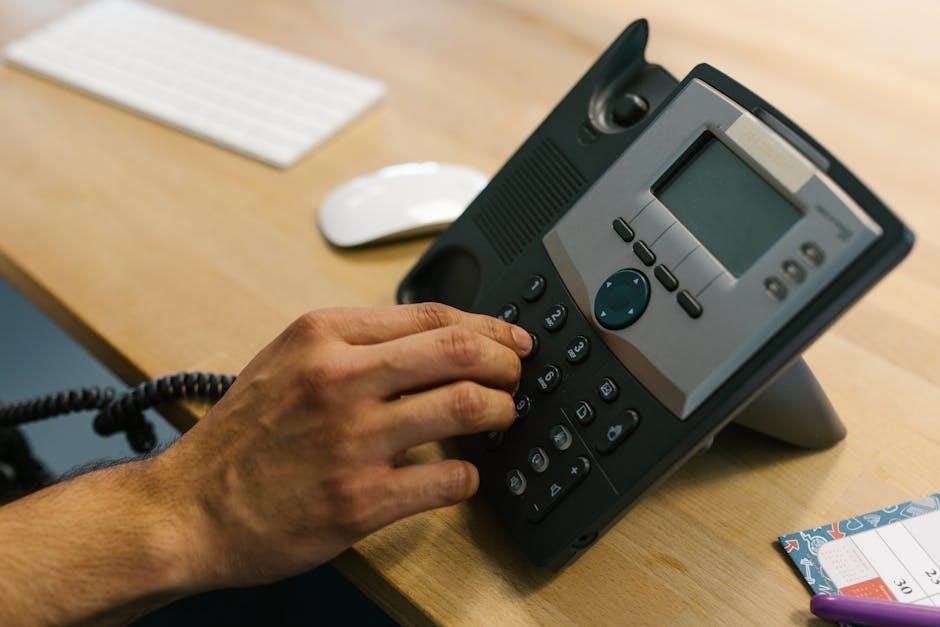
Programming a LiftMaster Keypad: Initial Setup
Initial setup involves locating the learn button on your opener and entering programming mode to establish a connection with the new keypad.
Locating the Learn Button
The “Learn” button is crucial for syncing your LiftMaster keypad with the garage door opener. Its location varies depending on the opener model. Typically, it’s found on the motor unit itself, often on the back or side. You might need a ladder to safely access it.
For openers with a wall control, the Learn button is often integrated into it – usually a colored button (purple, orange, or yellow). If you have an older model, the button might be small and recessed. Consult your garage door opener’s manual if you’re unsure of its exact location. Pressing this button initiates the programming process.
Entering Programming Mode
After locating the Learn button, press and release it to activate programming mode on your LiftMaster opener. You’ll usually have a limited timeframe – around 30 seconds – to complete the next steps. A flashing indicator light on the motor unit confirms the system is receptive to new codes.
Immediately after pressing the Learn button, return to your keypad and enter a four-digit PIN code. This initiates the pairing process. Ensure no other buttons are pressed during this sequence to avoid interference. The keypad will then communicate with the opener, establishing a secure connection.
Setting the Initial PIN Code
Once in programming mode, the keypad prompts you to create a new, four-digit PIN. Choose a code that is easy for you to remember, but difficult for others to guess. Avoid obvious sequences like “1234” or your birthdate. Enter your desired PIN, followed by the “#” key to confirm your selection.
The keypad will typically provide visual or audible feedback, such as a beep or a confirmation message, indicating successful PIN entry. If the process fails, repeat the steps, ensuring you press the Learn button and enter the PIN within the allotted timeframe.

Changing the PIN Code
Updating your PIN regularly enhances security. This section details a straightforward process for modifying your existing LiftMaster keypad code for controlled access.
Step-by-Step PIN Change Instructions
To alter your LiftMaster keypad’s PIN, begin by entering the existing four-digit code followed by the “#” key. Then, promptly input the new four-digit PIN you desire, again concluding with the “#” key. The system will typically request confirmation; re-enter the new PIN, finishing with “#”.
A successful change is often indicated by an audible tone or a visual confirmation on the keypad’s display. If errors occur during entry, the keypad may revert to the previous code or require you to restart the process. Always test the new code immediately after programming to verify functionality and ensure secure access.
Confirming the New PIN Code
After entering your desired new PIN, the LiftMaster keypad usually prompts for confirmation to prevent accidental changes. Re-enter the four-digit code precisely as you initially set it, followed by pressing the “#” key. Successful confirmation is typically signaled by a distinct audible beep or a visual message on the keypad’s screen.
Immediately test the newly programmed PIN by attempting to operate the garage door. This crucial step verifies the code’s functionality and ensures secure access. If the door doesn’t respond, repeat the programming process carefully.
Troubleshooting PIN Change Issues
If you encounter difficulties changing your PIN, first ensure you’re within range of the garage door opener and that the battery in the keypad has sufficient charge. Double-check that you’re following the programming sequence exactly as outlined in the manual. Incorrect button presses or timing can cause failures.
If the issue persists, try resetting the keypad to factory settings and re-programming. A temporary interference might also be the cause; try again after a few minutes. Contact LiftMaster support if problems continue.
Deleting a PIN Code
Removing user codes enhances security, especially when access needs revoking. This section details how to delete existing PINs and the implications for overall system security.
Removing Existing User Codes
To delete a specific PIN code, you’ll generally need to enter programming mode on your LiftMaster keypad. This is often achieved by pressing the “Learn” button on the garage door opener motor unit, or utilizing a button on the wall control panel. Once in programming mode, follow the keypad’s prompts – typically involving entering the master code followed by the PIN you wish to erase.
Confirm the deletion as prompted by the keypad. Remember that removing a code permanently revokes access for that user. Always double-check the PIN before confirming its removal to avoid unintended consequences. Regularly reviewing and deleting unused codes is a crucial security practice.
Master Code Considerations
The master code is paramount for keypad security, granting full control over user access and system settings. It’s crucial to memorize this code and store it securely, avoiding easily guessable combinations. If the master code is lost, a factory reset of the keypad may be required, erasing all programmed PINs.
Changing the default master code immediately after installation is highly recommended. Regularly review and update the master code as a preventative security measure. Protecting the master code safeguards your entire garage access system from unauthorized modifications.
Security Implications of Deleting Codes
Deleting a PIN code immediately revokes access for the associated user, enhancing security when a code is lost or a user no longer requires access. However, indiscriminate deletion without proper record-keeping can create confusion and potential security gaps.
Always confirm the correct code is being removed to avoid accidental lockout. Regularly audit active PIN codes and promptly delete those belonging to former employees or residents. Maintaining a log of deleted codes aids in tracking access history and identifying potential security breaches.
Temporary PIN Codes
Temporary PINs offer controlled access for guests or service providers, allowing you to set expiration dates for enhanced security and convenience.
Creating Temporary Access
To create a temporary PIN code, begin by entering programming mode on your LiftMaster keypad. This typically involves pressing the “Learn” button on your garage door opener motor unit. Then, follow the keypad’s prompts to select the option for creating a temporary access code.
You’ll be prompted to enter a four-digit PIN. Remember to choose a code that isn’t easily guessable. Once entered, the system will ask you to confirm the code. After confirmation, the temporary PIN is activated and ready for use. This allows limited-time access without compromising your primary security code.
Setting Expiration Dates for Temporary Codes
LiftMaster keypads offer the crucial ability to set expiration dates for temporary PIN codes, enhancing security. After creating a temporary code, navigate the keypad’s menu to find the expiration settings. You can typically specify the number of uses or a specific date and time when the code will become inactive.
This feature is invaluable for granting access to service providers or guests for a limited period. Once the set expiration is reached, the temporary PIN will no longer function, automatically securing your garage. Regularly review and update these settings for optimal protection.
Use Cases for Temporary PINs
Temporary PINs provide versatile access control for various situations. They are ideal for allowing delivery drivers, visiting family, or service technicians entry without sharing your primary access code. This minimizes security risks associated with permanent code distribution.
Consider using temporary codes for short-term rentals, contractors working on your property, or even for trusted neighbors needing occasional access. The ability to set expiration dates ensures the code is deactivated once its intended purpose is fulfilled, bolstering your garage’s overall security.
Resetting the Keypad
A factory reset clears all programmed codes, restoring the keypad to its original settings. This is useful for troubleshooting or when transferring ownership of the property.
Factory Reset Procedure
To perform a factory reset on your LiftMaster keypad, begin by locating the “Learn” button on your garage door opener motor unit. Press and hold the Learn button until the indicator light begins to flash rapidly. This signifies the system is entering programming mode. Next, enter a six-digit code – often 000000 – followed by pressing the # key.
Observe the keypad; a successful reset will typically be indicated by an audible beep or a change in the display. Important: This process erases all existing user codes, requiring you to reprogram the keypad entirely after completion. Always test the reset to confirm it worked correctly before proceeding with new programming.
When to Reset the Keypad
A keypad reset is crucial when you’ve forgotten the master PIN code, preventing access and requiring a complete system restart. It’s also recommended when selling your home, ensuring the new owners can establish their own secure access. If you suspect unauthorized access or experience consistent keypad malfunctions, a reset is a vital security measure.
Furthermore, resetting is necessary after replacing the garage door opener or if the keypad isn’t responding to programming attempts. Remember, a reset will erase all saved codes, so ensure you understand the implications before initiating the process.
Post-Reset Programming Steps
Following a factory reset, the keypad requires complete reprogramming. Begin by locating the “Learn” button on your garage door opener motor unit. Enter programming mode on the keypad, typically by pressing the “#” button. Then, set a new, memorable master PIN code – this is your primary access credential.
Subsequently, program individual user codes for family members or trusted individuals. Test each code thoroughly to confirm functionality. Remember to document your codes securely, but separately from the keypad itself, for future reference and potential recovery.

Troubleshooting Common Keypad Problems
This section addresses frequent issues, including unresponsive keypads, incorrect PIN errors, and signal interference, offering solutions for restoring proper functionality and security.
Keypad Not Responding
If your LiftMaster keypad isn’t responding, begin by checking the batteries; low batteries are a common culprit. Ensure they are fresh and correctly installed, observing proper polarity. Next, verify that the keypad hasn’t been accidentally locked or entered a temporary lockout mode.
Confirm there’s no significant radio frequency interference nearby, as this can disrupt the signal. Try resetting the keypad by briefly disconnecting the power source. If the issue persists, consult the garage door opener’s manual to confirm compatibility and proper wiring. A faulty keypad may require replacement.
Incorrect PIN Error
Encountering an “Incorrect PIN” error on your LiftMaster keypad indicates the entered code doesn’t match the programmed settings. Double-check the entered digits, ensuring accuracy and paying attention to capitalization if applicable. If you’ve forgotten the PIN, a factory reset of the keypad might be necessary, but this will erase all saved codes.
Review the master code documentation, if available. Repeated incorrect attempts may trigger a temporary lockout. If the problem continues after verifying the code and resetting, consider potential interference or a malfunctioning keypad requiring professional attention.
Interference Issues
Wireless interference can disrupt LiftMaster keypad functionality, causing inconsistent operation or complete failure to respond. Common sources include other wireless devices, baby monitors, or even certain types of lighting. Try relocating the keypad or garage door opener to minimize proximity to potential interference sources.
Ensure there are no new electronic devices installed near the garage. If the issue persists, consult a professional to assess the radio frequency environment and recommend solutions, potentially involving frequency adjustments or shielding.

LiftMaster Keypad Features
LiftMaster keypads offer convenient features like backlighting for visibility, weather resistance for durability, and easy battery replacement for continuous operation.
Backlight Functionality
The LiftMaster keypad incorporates a helpful backlight feature, significantly enhancing visibility in low-light conditions. This is particularly useful during nighttime or in dimly lit garages, ensuring you can easily enter your PIN code without struggling to see the buttons. The backlight automatically activates when the keypad is touched or when ambient light is insufficient.
This feature contributes to increased security and convenience, eliminating the need for external lighting to operate the keypad. The duration of the backlight illumination may vary depending on the specific keypad model, but it generally remains active long enough to complete the PIN entry process.
Weather Resistance
LiftMaster keypads are designed with robust weather resistance, allowing for reliable operation in various environmental conditions. These keypads are built to withstand rain, snow, and temperature fluctuations, ensuring consistent performance throughout the year. The exterior casing is constructed from durable materials that protect the internal components from moisture and debris.
However, it’s important to note that while weather-resistant, the keypad isn’t entirely waterproof. Avoid direct, prolonged exposure to extreme weather events. Regular inspection for any signs of damage can help maintain optimal functionality and longevity of the device.
Battery Replacement
Maintaining your LiftMaster keypad involves periodic battery replacement to ensure continuous operation. Typically, keypads utilize standard alkaline batteries, and a low battery indicator will signal when replacement is needed. Carefully open the battery compartment, usually located on the keypad’s back or side, and replace the old batteries with new ones of the correct type.
Ensure proper polarity alignment during installation. After replacement, test the keypad functionality to confirm successful operation. Regularly checking battery levels prevents unexpected interruptions to your garage access.

Advanced Keypad Settings
Explore customizable features like volume adjustment, enhanced security options, and remote compatibility settings to personalize your LiftMaster keypad experience.
Adjusting Keypad Volume
LiftMaster keypads often feature adjustable volume controls, allowing you to customize the audible feedback for button presses. This is particularly useful for environments where a louder or quieter tone is preferred. To adjust the volume, typically you’ll need to enter programming mode – often by pressing the ‘*’ or ‘#’ key followed by the master code.
Once in programming mode, consult your specific model’s instructions, as the method varies. Some keypads use a sequence of button presses (like up/down arrows) to cycle through volume levels, while others may have dedicated volume control codes. Always test the volume after each adjustment to ensure it’s set to your desired level.
Security Settings Review
Regularly reviewing your LiftMaster keypad’s security settings is crucial for maintaining a secure home. This includes verifying the master code hasn’t been compromised and ensuring all user PINs are unique and not easily guessable. Consider changing the master code periodically, especially after adding or removing users.
Explore features like temporary PIN codes for guests, and promptly delete codes for former residents or service providers. Be mindful of potential interference, which could allow unauthorized access. A strong security posture minimizes risks and protects your property.
Remote Compatibility
LiftMaster keypads are designed to work seamlessly with LiftMaster remote controls, offering multiple access options for your garage. Compatibility varies depending on the keypad and remote model; newer systems generally support rolling code technology for enhanced security. Ensure your remote and keypad share the same frequency for proper operation.
Programming a remote to the keypad often involves utilizing the “Learn” button on the garage door opener motor unit. Refer to your specific model’s documentation for detailed instructions on pairing remotes and keypads for convenient access.

Old LiftMaster Keypad Programming
Older LiftMaster keypads utilize a similar programming process, often involving accessing the “Learn” button on the garage door opener unit for code input.
Programming Older Models
Programming older LiftMaster keypad models generally follows a consistent procedure, though slight variations may exist. Begin by ensuring the keypad has fresh batteries. Accessing the “Learn” button, typically located on the garage door opener motor unit, is crucial. Pressing this button initiates a programming window.
Then, enter the desired PIN code on the keypad itself, followed by the “Enter” or “#” key. Observe the garage door opener to confirm successful programming – usually indicated by the door cycling briefly. If unsuccessful, repeat the process, ensuring proximity to the motor unit. Refer to the specific model’s documentation for precise instructions.
Differences in Learn Button Location
The location of the “Learn” button varies across LiftMaster models, impacting the programming process. On many older openers, it’s found on the motor unit itself, often requiring a ladder for access. Newer models frequently feature the “Learn” button on the wall control panel, offering easier accessibility.
Some systems utilize a recessed button, needing a pen or similar tool for activation. Always consult your opener’s manual to pinpoint the exact location. Incorrectly identifying the “Learn” button will prevent successful keypad programming, leading to frustration and security concerns.
Compatibility with Newer Systems
Older LiftMaster keypads may exhibit compatibility issues with the latest garage door opener systems. While many older keypads can be programmed to newer openers, some advanced features might not function correctly. Newer systems often utilize rolling code technology for enhanced security, potentially causing conflicts with older, fixed-code keypads.
It’s crucial to verify compatibility before attempting programming. If issues arise, consider upgrading to a modern LiftMaster keypad designed for seamless integration with current systems, ensuring optimal performance and security features.